DIY home repairs can save money and build long-term homeowner confidence—if approached methodically. This guide explains how to assess repair difficulty, assemble essential tools, understand safety requirements, and avoid common beginner mistakes. With practical examples and research-backed insights, homeowners can make informed decisions about which repairs to tackle and when professional help is the wiser choice.
Homeownership inevitably brings repairs. A leaking faucet, cracked drywall, sticking door, or faulty outlet can quickly shift from minor annoyance to daily frustration. Many homeowners ask the same practical questions:
- Can I fix this myself?
- What tools do I actually need?
- How do I avoid making the problem worse?
Approaching DIY repairs with confidence doesn’t mean taking unnecessary risks. It means understanding the scope of the issue, using appropriate tools, and recognizing when a repair crosses into professional territory.
According to surveys from the Home Improvement Research Institute, homeowners increasingly attempt small repairs themselves, particularly younger buyers. Meanwhile, guidance from the U.S. Consumer Product Safety Commission consistently emphasizes preparation and proper tool use to prevent injuries.
Confidence in DIY isn’t about speed or ambition. It’s about readiness.
Start with the Right Mindset: Diagnose Before You Act
The most common DIY mistake is acting before fully diagnosing the problem. A dripping faucet, for instance, may stem from a worn washer, a damaged cartridge, or mineral buildup. Replacing the wrong component wastes time and money.
Before picking up a tool:
- Identify the exact symptom.
- Research possible causes from reputable sources.
- Confirm the required tools and replacement parts.
- Estimate time and cost.
Homeowners often search: How do I know if a repair is too complicated?
A practical rule: If the repair involves load-bearing structures, gas lines, extensive electrical rewiring, or major plumbing behind walls, it likely requires licensed professionals. For cosmetic and surface-level fixes, DIY is usually appropriate.
Thoughtful preparation builds real confidence.
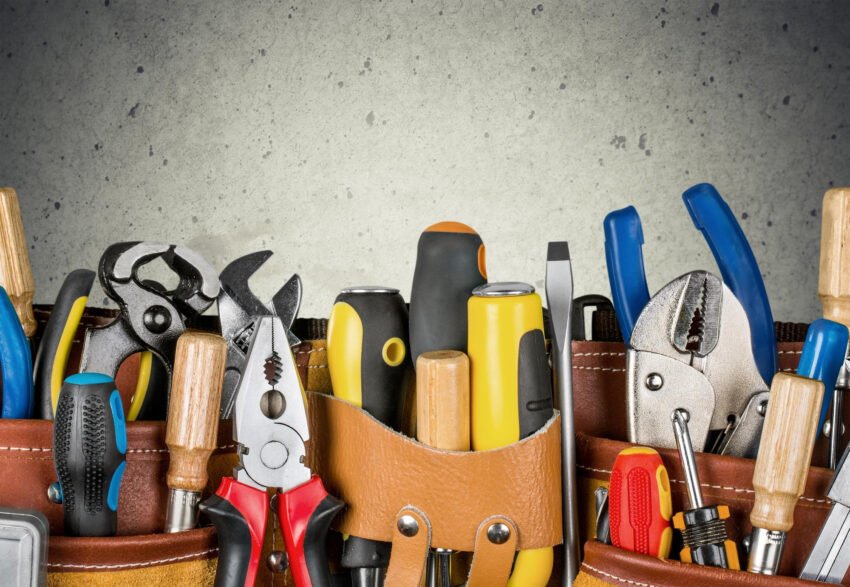
Build a Core Toolkit (Without Overspending)
One of the most frequent questions is: What tools should every homeowner own?
You don’t need a fully equipped workshop. A focused, quality toolkit covers most basic repairs.
Essential Tools for DIY Home Repairs
- Cordless drill with drill and driver bits
- 16-ounce claw hammer
- Tape measure (25-foot)
- Level (24-inch recommended)
- Adjustable wrench
- Set of screwdrivers (flathead and Phillips)
- Pliers (needle-nose and standard)
- Stud finder
- Utility knife
- Safety gear: gloves, goggles, hearing protection
Investing in mid-range, durable tools reduces frustration. Stripped screws and unstable ladders are common sources of DIY setbacks.
The Occupational Safety and Health Administration consistently notes that improper tool use contributes significantly to household injuries. Choosing tools that fit your hand comfortably and reading manufacturer instructions reduces risk.
Understand Safety Before Skill
Confidence grows from safety awareness.
Homeowners frequently search: Is it safe to replace a light fixture myself?
The answer is yes—if power is shut off at the breaker and voltage is confirmed with a tester.
Similarly, plumbing repairs require turning off water supply valves and relieving pressure before disconnecting components.
Basic Safety Guidelines
- Shut off power or water before repairs
- Use a voltage tester, not assumption
- Wear eye protection when drilling or sanding
- Work on stable ladders positioned correctly
- Avoid working alone on higher-risk tasks
Even simple repairs can cause damage if rushed. A homeowner replacing a ceiling fan without properly securing the mounting bracket may experience wobbling or structural strain. Taking time to verify support prevents larger issues.
Start with Manageable, Skill-Building Repairs
Confidence develops incrementally. Begin with straightforward tasks that provide immediate results.
Example 1: Fixing a Running Toilet
A running toilet often requires replacing a flapper or adjusting the float.
Step-by-step approach:
- Turn off the water supply.
- Remove tank lid and inspect components.
- Identify worn flapper or chain misalignment.
- Replace flapper using manufacturer-compatible part.
- Turn water back on and test.
Cost: $10–$25
Time: 30–60 minutes
This repair teaches part identification and basic water shutoff procedures—valuable foundational skills.
Example 2: Patching Drywall Holes
Small nail holes or dents are ideal beginner repairs.
- Clean damaged area.
- Apply lightweight spackle with putty knife.
- Allow to dry.
- Sand smooth.
- Prime and paint.
Cost: $20–$50
Time: Half-day including drying
Drywall repair improves both confidence and aesthetics without major risk.
Example 3: Replacing a Faulty Outlet
If an outlet stops working but wiring is intact, replacing the receptacle is manageable.
- Shut off breaker.
- Confirm no power with tester.
- Remove cover plate and outlet.
- Transfer wires to new outlet.
- Secure and test.
If wires are damaged or multiple outlets fail, consult an electrician.
Know When to Stop
A common DIY failure point occurs when a repair expands beyond initial expectations.
For example, replacing a faucet may reveal corroded shutoff valves. At this stage, consider whether the new issue falls within your skill range.
Homeowners often search: When should I hire a professional?
Hire a licensed professional if:
- You encounter mold or water damage inside walls
- Electrical wiring appears brittle or outdated
- Plumbing joints are soldered and require torch work
- Structural framing needs modification
- Local building codes require permits
According to the National Association of Home Builders, improper DIY repairs can affect resale value and inspection outcomes. Thoughtful restraint is part of responsible homeownership.
Budget Realistically for DIY Repairs
Many assume DIY automatically saves money. While labor costs are avoided, tools, materials, and mistakes still add up.
Budgeting tips:
- Add 10–15% contingency for unexpected materials
- Buy slightly more paint or tile than measured
- Keep receipts for returnable items
- Avoid buying specialty tools unless reuse is likely
For example, renting a tile cutter may be more cost-effective than purchasing one for a single backsplash project.
Planning financially reduces stress and preserves confidence.
Develop a Research Routine
Successful DIY homeowners rarely rely on a single tutorial.
Effective research habits include:
- Watching multiple reputable instructional videos
- Reading manufacturer manuals
- Reviewing local building code summaries
- Consulting community forums cautiously
Cross-referencing information helps identify consistent best practices.
When possible, inspect how your home was built. Older homes may use different wiring standards or plumbing materials. Understanding your home’s age and construction type prevents surprises.
Build Confidence Through Documentation
Keep a repair log.
Document:
- Date of repair
- Materials used
- Part numbers
- Photos before and after
- Notes on lessons learned
This habit improves future troubleshooting and helps during resale discussions. Buyers appreciate organized maintenance records.
Confidence isn’t just about ability—it’s about clarity and preparedness.
Frequently Asked Questions
1. What is the easiest home repair for beginners?
Fixing a running toilet or patching drywall are widely considered beginner-friendly.
2. How do I know if I’m using the right tools?
Manufacturer instructions typically specify required tools; avoid substituting incompatible equipment.
3. Can DIY repairs affect my homeowners insurance?
Improper electrical or structural work can create liability issues—review your policy.
4. How long should a basic repair take?
Most beginner repairs take 30 minutes to a few hours, depending on complexity.
5. Are YouTube tutorials reliable?
Many are helpful, but cross-check information and prioritize reputable channels.
6. Should I get permits for small repairs?
Cosmetic fixes usually do not require permits; electrical and structural changes often do.
7. Is it worth buying expensive tools?
Invest in quality for frequently used tools; rent specialty tools.
8. How do I avoid stripping screws or damaging walls?
Use the correct bit size and avoid overtightening.
9. What safety equipment is essential?
Safety glasses, gloves, and a voltage tester are minimum essentials.
10. How can I build confidence over time?
Start small, document repairs, and expand gradually into more complex tasks.
From Hesitation to Competence: A Practical Path Forward
DIY home repairs are not about proving capability. They are about maintaining your home responsibly and economically. Confidence comes from preparation, measured decisions, and realistic expectations.
Start with manageable repairs. Invest in reliable tools. Respect safety guidelines. Know your limits.
Over time, what once felt intimidating becomes routine. Each completed repair strengthens both your home and your understanding of it.
Homeownership rewards steady learning. With the right approach, DIY becomes not just a cost-saving strategy—but a practical life skill.
Key Confidence Builders at a Glance
- Diagnose before acting
- Invest in core tools
- Follow safety procedures
- Begin with low-risk repairs
- Research from multiple sources
- Budget for contingencies
- Recognize professional boundaries
- Keep repair records