Professional-looking DIY results don’t depend on talent alone—they depend on process. This guide outlines a structured, step-by-step method for planning, executing, and finishing home projects so they look polished and durable. From preparation and tool selection to finishing details and quality control, these principles help homeowners achieve results that feel thoughtfully built, not improvised.
Why Some DIY Projects Look Professional—And Others Don’t
Many homeowners ask: How do I make my DIY projects look professional? Why does my paint job look uneven? Why don’t my installations feel “finished”?
The difference rarely comes down to skill alone. In most cases, it comes down to planning, preparation, and attention to detail.
According to the National Association of Home Builders, craftsmanship quality is one of the strongest drivers of buyer confidence in residential properties. Similarly, surveys from the National Association of Realtors indicate that perceived maintenance and finish quality strongly influence home value and time on market.
Professional contractors follow systems. They stage materials. They measure twice. They prepare surfaces thoroughly. Homeowners who adopt those habits consistently produce better outcomes.
The following step-by-step approach mirrors how professionals think through projects.
Step 1: Define the Outcome Before Starting
Professionals never start with tools. They start with a clear objective.
Before touching a paintbrush or drill, ask:
- What should the finished project look like?
- What problem am I solving?
- Is this cosmetic, structural, or functional?
- Do I need permits or professional consultation?
For example, if repainting a living room, your objective isn’t “change the color.” It’s “create an even, durable finish with clean edges and no visible patchwork.”
Clarity prevents rushed decisions mid-project.
Step 2: Research Standards, Not Just Tutorials
Online videos can be helpful, but professionals rely on building standards, not trends.
For energy-related projects, guidance from the U.S. Department of Energy provides technical recommendations. For plumbing or water efficiency, the Environmental Protection Agency offers clear performance benchmarks.
Understanding why something is done—not just how—improves quality. For example, priming drywall before painting isn’t optional; it ensures adhesion and uniform absorption.
Step 3: Invest in Preparation
Preparation is where most DIY projects either succeed or fail.
Professional prep often takes longer than the visible work.
For painting, that means:
- Cleaning surfaces
- Filling holes
- Sanding rough patches
- Caulking gaps
- Applying primer
For installations, it means:
- Measuring twice
- Confirming level and plumb alignment
- Checking wall studs
- Dry-fitting components
Skipping preparation often leads to uneven finishes, visible seams, and durability issues.
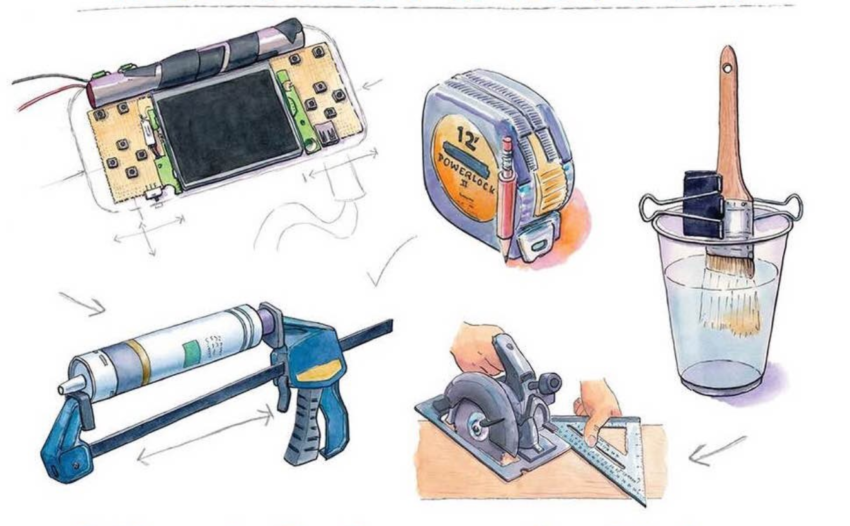
Step 4: Use the Right Tools—Not Improvised Ones
Many homeowners attempt projects with minimal equipment. Professionals invest in tools because precision matters.
Examples:
- A quality angled brush produces cleaner cut lines
- A laser level ensures straight installations
- Stud finders prevent drywall damage
- Caulking guns with smooth trigger control create even beads
You don’t need commercial-grade tools, but you do need appropriate ones. Poor tools produce uneven results.
Step 5: Work Methodically, Not Quickly
Professionals move efficiently, but not hastily.
Homeowners often rush through:
- Paint drying times
- Adhesive curing periods
- Sealant setting windows
Rushing introduces imperfections.
For example, when installing baseboards, professionals:
- Measure and cut
- Dry fit
- Secure with finish nails
- Fill nail holes
- Caulk seams
- Sand and paint
Each step contributes to a seamless final look.
Step 6: Focus on Finish Details
The details are what make a project look complete.
Professional finishing includes:
- Clean paint edges
- Invisible fasteners
- Smooth caulk lines
- Properly aligned hardware
- Even spacing
In kitchens, replacing cabinet hardware requires precise measurement to ensure alignment. Slight misalignment is immediately noticeable.
In bathrooms, uneven caulk around tubs signals amateur work.
Details define quality.
Step 7: Understand When to Stop DIY
One of the most professional decisions you can make is knowing when to involve an expert.
Projects that typically require licensed professionals include:
- Electrical panel modifications
- Structural wall removal
- Gas line installation
- Major plumbing rerouting
Attempting complex work without training can reduce home value and create safety hazards.
The Consumer Product Safety Commission consistently reports injuries related to improper home improvement practices. Safety should always guide decisions.
Step 8: Inspect Your Own Work Critically
Professionals perform walkthroughs before completing a job. Homeowners should do the same.
After finishing a project:
- View it in natural daylight
- Check alignment from multiple angles
- Test functionality
- Look for uneven finishes
Small corrections—sanding a rough patch or touching up paint—often elevate a project from adequate to polished.
Step 9: Document Improvements
For resale purposes, documentation matters. Keeping records of materials, warranties, and installation dates adds credibility.
The National Association of Realtors notes that buyers value transparency in home improvements.
Simple documentation includes:
- Before-and-after photos
- Product specifications
- Receipts
- Maintenance logs
Professionalism includes accountability.
Step 10: Prioritize Durability Over Trend
Professional work lasts.
Choose:
- Neutral paint palettes
- Durable materials
- Quality hardware
- Moisture-resistant finishes in bathrooms
Avoid design decisions based solely on short-term trends. Timeless materials age better and protect long-term value.
Frequently Asked Questions
1. How do I make my DIY projects look less amateur?
Focus on preparation, precision, and finish details rather than speed.
2. What’s the biggest mistake DIYers make?
Skipping surface prep and rushing drying times.
3. Do I need expensive tools?
Not necessarily, but appropriate tools significantly improve results.
4. How do professionals get clean paint lines?
Using quality angled brushes, painter’s tape correctly, and steady technique.
5. Should I always get permits?
For structural, electrical, and plumbing changes, yes—check local codes.
6. How long should I wait between paint coats?
Follow manufacturer guidelines; typically 2–4 hours depending on conditions.
7. Is it worth hiring a pro for finishing work?
In some cases, yes—especially for visible areas like cabinetry or flooring.
8. What projects add the most professional appeal?
Neutral painting, hardware updates, lighting upgrades, and trim refinement.
9. How do I know if a project is beyond my skill level?
If it involves safety risks, load-bearing structures, or unfamiliar systems, consult a professional.
Crafting Work That Reflects Care and Competence
Professional-looking DIY isn’t about perfection—it’s about discipline. When homeowners adopt structured planning, proper preparation, and careful finishing practices, results improve dramatically.
Projects that feel intentional inspire confidence. Whether you’re updating a room for yourself or preparing to sell, the process you follow determines the outcome you achieve.
Professional DIY Checklist for Every Project
- Define the final outcome clearly
- Research building standards and safety guidelines
- Prepare surfaces thoroughly
- Use appropriate tools
- Work in measured, deliberate stages
- Inspect and refine before calling it finished
- Document materials and warranties